The selection tools are used to retrieve information about objects that are in the current Selection Layer. It is important to understand that there may be many layers in the map window, but only the ones configured in the selection layer below will have information attached to them. The information is displayed in the Information Panel (to the right of the map).
Each IntraMaps module now has the ability to have multiple selection layers. When a selection tool is used in the map window it is applied to the current selection layer that is visible in the Selection Layer drop down menu. By doing this, a layer containing vegetation, for example, boundaries can be used to allow automatic zooming and selection to a specific vegetation boundary. Usually, a module title will indicate which layer is the default selection layer, however this is not always the case so check the Selection Layer box (as described above). For example a vegetation module may have a default selection layer containing vegetation information but also an additional cadastre layer that provides the facility for property searches and cadastral information etc...

This tool is used to select objects on the selection layer, using a point to define the search region. Click the left mouse button on the tool to activate it. Click the left mouse on an object to retrieve information on that object. Panning of the map can be done by holding the left mouse button down and dragging the map, while point selection is active.
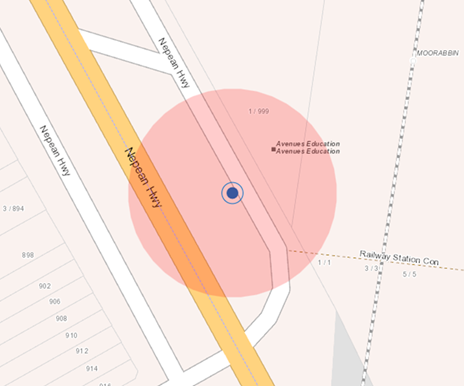
This tool is used to select objects on the selection layer, using a circle to define the search region. Click the left mouse button on the tool to activate it. Click and hold the left mouse button and then drag the mouse away from that point to define a selection circle (shown in blue). The radius of the circle and the coordinates of your mouse pointer will be displayed in the status bar at the bottom left of the screen. Release the left mouse button to apply the selection.
This tool is used to select objects on the selection layer, using a rectangle to define the search region. Click the left mouse button on the tool to activate it. Click and hold the left mouse button and then drag the mouse away from that point to define a rectangle (shown in blue) to select within. The height and width of the rectangle and the coordinates of your mouse pointer will be displayed in the status bar at the bottom right of the screen. Release the left mouse button to apply the selection.
This tool is used to select objects on the selection layer, using a user define region. Click the left mouse button on the tool to activate it. Click the left mouse button and then click at each intermediate point until you have defined all the edges of the region to select, then double-click the mouse to close the polygon on the last point. As you go, the coordinates of your mouse pointer and the length of each line created will be displayed in the status bar at the bottom left of the screen.
|
Note that when selecting the map using Circle, Rectangle or Polygon, objects that are within the drawn shape, as well as those that touch the edge of the shape, will be selected. |

Share Boundary Selection
This tool allows you to select all objects in the selection layer that share a common boundary. Click on the tool and then left click on an object in the map. All objects sharing a common boundary with the one you specified will be added to the selection.
Buffer Around
This tool is used to select objects on the selection layer, using a user defined selection within a specified distance of an object within the selection layer. Click on the tool and enter a distance in the text field to the left of the button. Then left click on an object in the map. All objects within the specified distance of the object you specified will be selected.
Add to Selection
When activated, by clicking on the icon, every selection becomes a cumulative one. As a result, a series of selection tools and searches can be used to create a cumulative selection. This is useful when creating a MailMerge.

Remove from Selection
This tool is used to remove objects from the current selection, it behaves like the Rectangle Tool by removing objects from the selection that are within the drawn rectangle.
|
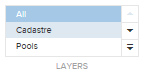
This dialogue box is used to pick a selection layer from the list and gives you the ability to search different types of information within the current module. Click the left mouse button on the drop down menu and then select a previously configured layer from the menu. For example if I want to find out pool Information instead of cadastre I simply select pools from the drop down menu and now when I make a selection (with any of the tools below) or carry out a pool Search, pool Information will now display in the Selection Panel. If all is selected, then all the selection layers in the list will be searched.

This tool is used to retrieve information from the map layers in the Map Window. The data that the Information Tool can retrieve is limited to the spatial layers, whereas the Selection tools can be configured to retrieve data from multiple data sources. Click the left mouse button on the tool to activate it. Click on, or drag a circle around, the object in the map that you would like to retrieve information for. This tool will return information for all objects in any layers at the point clicked and that are set as selectable in the Layer Control. The information is returned in a pop-up window.

Coordinates
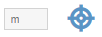
This tool is used to retrieve the coordinate at the point specified. Click the left mouse button on the tool to activate it. Click on the location that you would like to retrieve the coordinate for. This tool will return coordinate information in the same projection as that configured for the Map Window. The information is returned in a pop-up window. Alternatively the coordinates of the current position of the mouse pointer can be viewed in the bottom left corner of the application window.

Measure Distance
This tool is used to measure a distance in the map window. Click the left mouse button on the tool to activate it. Click the left mouse button in the map to designate the point you wish to begin your measurement. Subsequent single left clicks will allow you to measure a new segment and change the direction of your measurement. The intermediate distances will be displayed dynamically on the map as each segment is defined. Double click the mouse on the last point to perform the distance calculation. The total distance and the intermediate distances will be displayed in a result window. The unit of measurement can also be changed in this result window by choosing the units from the drop-down list.
![]()
Measure Area
This tool is used to measure an area in the map window. Click the left mouse button on the tool to activate it. Click the left mouse button on the screen to designate the point you wish to begin your measurement. Subsequent single left clicks will allow you to measure a new segment and change the direction of your measurement. The intermediate distances will be displayed dynamically on the map as each segment is defined. Double click the mouse on the last point to close the polygon and perform the area calculation. The total area, perimeter and the intermediate distances (including the distance from the last point back to the first to close the region) will be displayed in a result window.

This tool allows you to pin point the map at your current location, providing you are viewing IntraMaps on a GPS enabled device. Click the left mouse button on the tool to activate it. This action toggles the GPS on. This tool has 2 states, the first click will centre the map on your current location, the second click will trigger the 'tracking mode' which will ensure that the map follows you as you move around, every time your location goes outside the current bounds of the map, IntraMaps will automatically re-centre the map on your current location. In this mode the tool has a dark blue highlight. The red outline around the blue dot indicates the estimated accuracy of the GPS position as reported by the GPS.To turn the GPS off simply click the left mouse button on the tool a third time to de-activate it.
|