The View control tool bar allows the user to control the current view shown in the map. These tools also allow the user to move around the map and obtain greater visual detail on objects by controlling the zoom level.


This tool is used to zoom the map to its default view. In most instances this will be the broadest view of the data available allowing the user to zoom out quickly.

This tool allows the user to move the map by dragging it. Click the left mouse button on the tool to activate it. Click and hold the left mouse button and drag the map to the desired location. The map will then refresh showing the detail within the new location.

This tool allows the user to enable a single click to zoom in by a factor of two, or draw a marquee so that the zoom area can be defined. Click the left mouse button on the tool to activate it. Then single click on the map to perform a zoom in on a particular location. The map will zoom in at twice the previous zoom level. If the user clicks and holds the left mouse button, then drags a rectangle (marquee) and releases the mouse button, the map will zoom in to the area that the user has defined within the marquee.

This tool allows the user to use a single click to zoom out by a factor of two. Click the left mouse button on the tool to activate the it. Then single click on the map to perform a zoom out. The map will zoom out twice the original zoom level.

Click the left mouse button on the tool to go back to the previous view. This tool only changes the Map View and will not alter the selections the user has made. To navigate between selections use the previous and next buttons in the Information Panel. This button is similar in function to the web browser's 'Back' button, however it only affects the Map Window view.

This tool is used to take the user to the next map view. This button is greyed out if it is not available (usually it only becomes active after using the Back button, see above) and becomes active as long as there is a next view that it can display. Click the left mouse button on the tool to go to the Next View. This tool only changes the Map View and will not alter the selections the user has made. To navigate between selection use the previous and next buttons in the Information Panel.
|
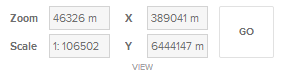
The View dialogue shows the user, current zoom, scale and central map coordinates. This is dynamic and changes based on the current map view, i.e. As the user zooms in and out the zoom and scale values change accordingly. Similarly as a user pans the map in any direction the central map coordinates are also updated.
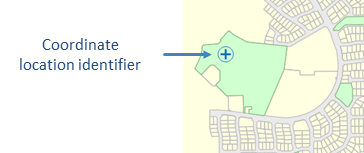
This tool can also be used as a 'Go to' function i.e. If the user has a desired zoom or scale value that they wish the map to display at, then the user can type the value in the relevant sections and press the 'Go' button and the map will display at the desired view. Similarly if the user has a known XY coordinate location that they would like the map to zoom to then this can be entered in the relevant X & Y coordinate locations. Once the desired coordinates have been added the user can then press the 'Go' button and the location will highlight on the Map window i.e.
|
|
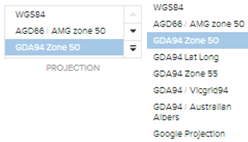
The Projection dialogue works in conjunction with the 'View' dialogue as mentioned above. The view dialogue can change based on a selected projection. For example if the user wishes to locate a position on the map at a specified Latitude/Longitude then this is possible by selecting a corresponding projection from the drop down menu i.e. GDA94 Lat/Long. Once selected, the coordinates in the 'View' dialogue will change to reflect the selected projection.
|
Any selected Latitude/Longitude projection will show the coordinates in decimal degree format. |
|
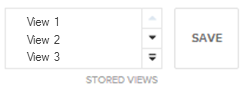
The 'Stored Views' panel allows the user to save the current map view i.e. the data that is displayed in the 'Views' section above. Views can only be saved if the user is authenticated. This is set up by the administrator.
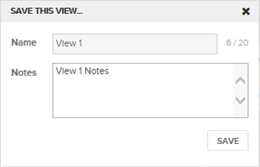
To Save a view, simply zoom into a location, and then click the 'Save' button. The save view dialogue box appears i.e. below.
|
Enter the View Name and any required notes. Click Save and your view name appears in the Saved Views dialogue. You now have the ability to go to this view at any time, and in any module, by clicking on the Saved Views name. Additionally, specific views can be saved to be used at a later date, provided appropriate security settings are used. Check with your system administrator if you are unable to save views.